
Setting Up Your Navigator RIP Platen Templates
The Navigator RIP software is the software you will use to print from your Summit Direct to Garment Printer.
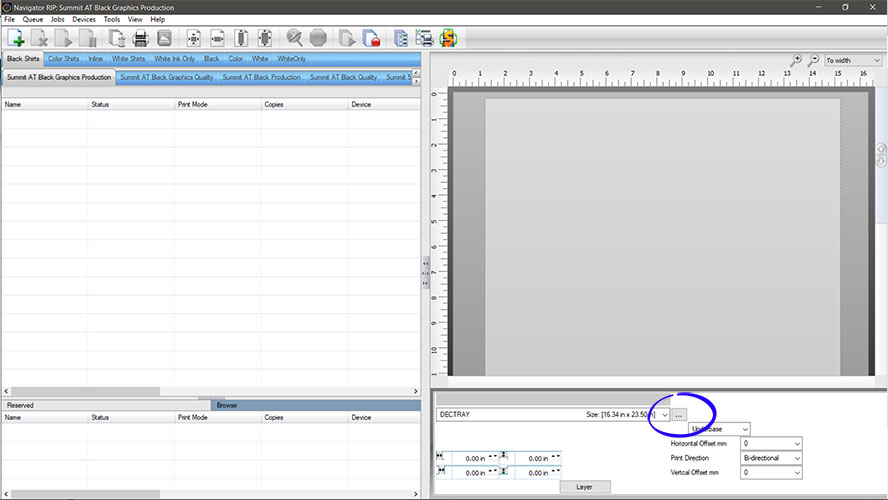
Once the Navigator RIP software has been installed, there are a few adjustments that must be made before you begin printing. The first step will be to set up the Platen Templates you will use.
Click the ... button to start. (See below)
The Decoration Tray Template
The Decoration Tray Template will be the starting point for all the other templates you will use in the Navigator RIP. This template is used for one large print utilizing the maximum size of the platen.
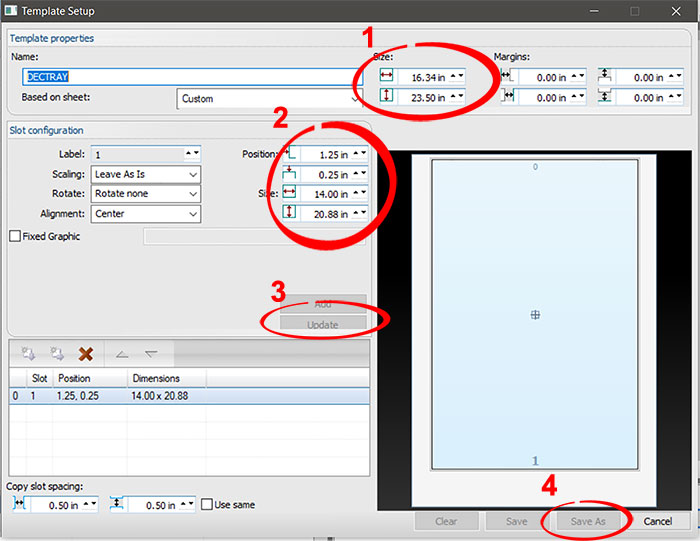
Steps/information corresponding to above image
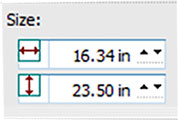
- The Template size (will be used for all setups)
- The Printable area (will be different for all setups)
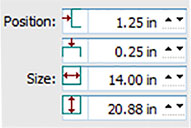
- Change the template name to DECTRAY (short for Decoration Tray). Then chang the Template Size and Printable area to the above values.
- Click the Update button.
- Click Save As.
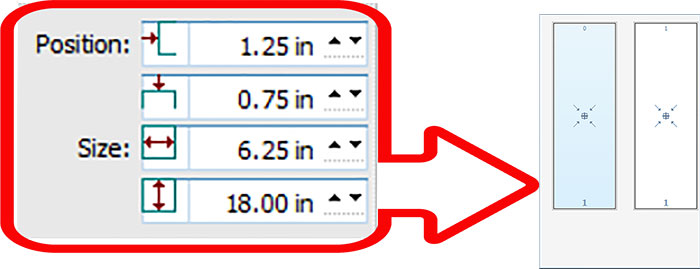
Decoration Tray 2-Up Template
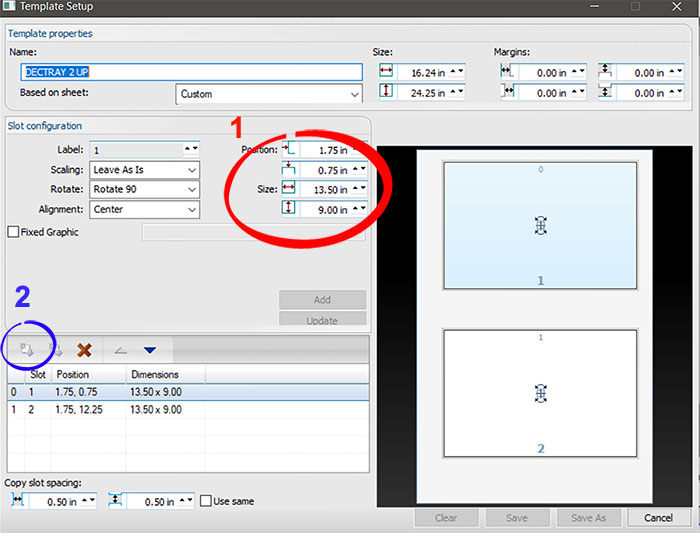
Details below
- Printable area
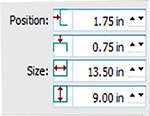
- Click the Copy Down button (circled above). Use the Position and Size below for this step.
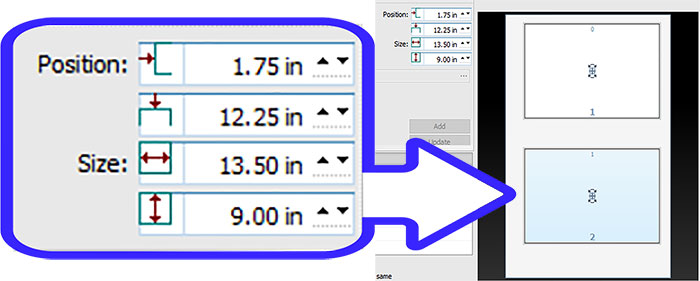
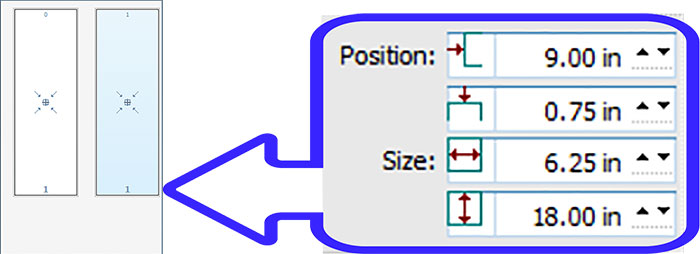
Decoration Tray 2 Sleeves
Details below
- Insert the Position and Size parameters and then click Update.
- Click Copy Right (circled above). Now insert parameters for 2 and click Update, then click Save As.
Decoration Tray 4-Up
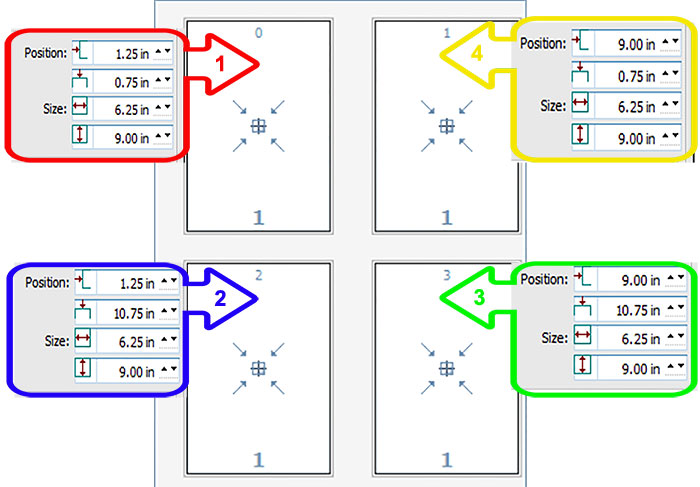
Details below
- Change template name to Decoration Tray 4 Up. Insert Position and Size parameters. Click Update and Copy Right then Down.
- Select bottom left. Insert Position and Size and click Update then Copy Right.
- Select bottom right. Insert Position and Size. Click Update.
- Select top right. Insert Position and Size. Click Update and then Save As.
Share this page:


