
Printing Inline Black Shirts
- First make sure you are on the correct Queue and Sub-Queue.

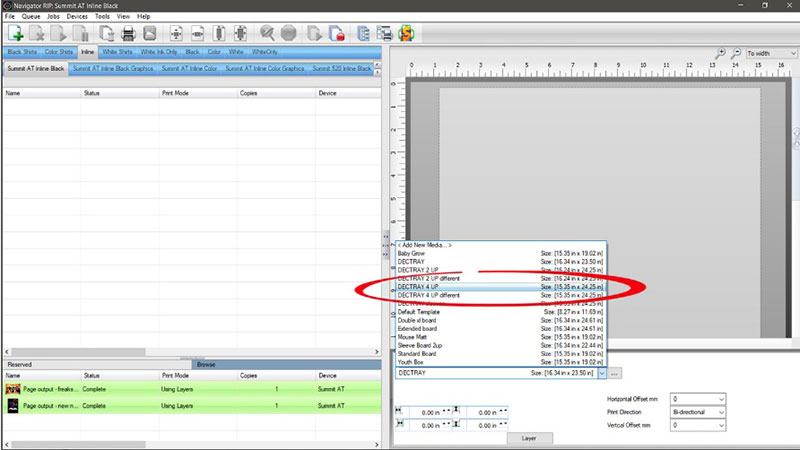
- Select the Decoration Tray 4 Up Platen.
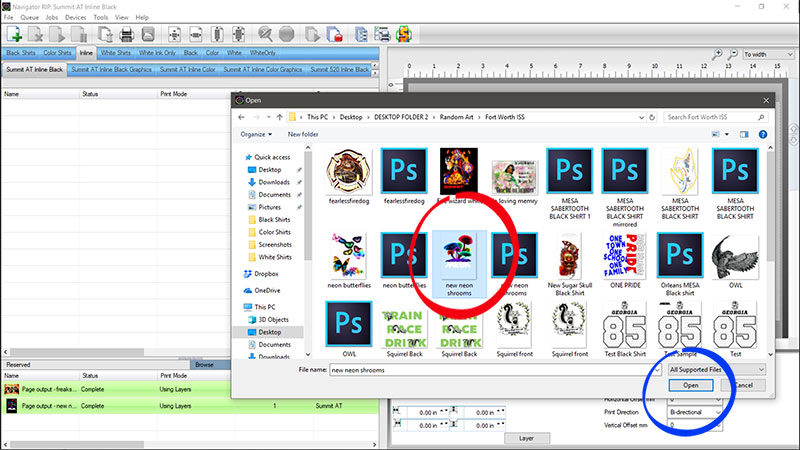
- Now click the Add File Icon.

- Now select the file you want and click Open.
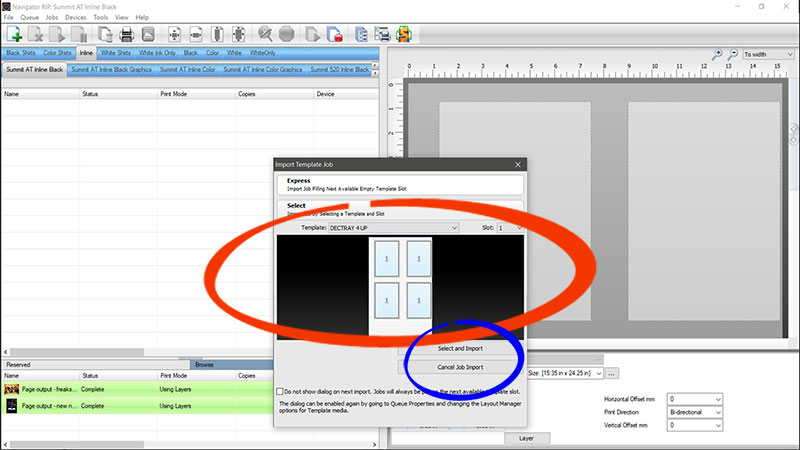
- Make sure to select the Template that matches the Platen you selected. Then click Select and Import.
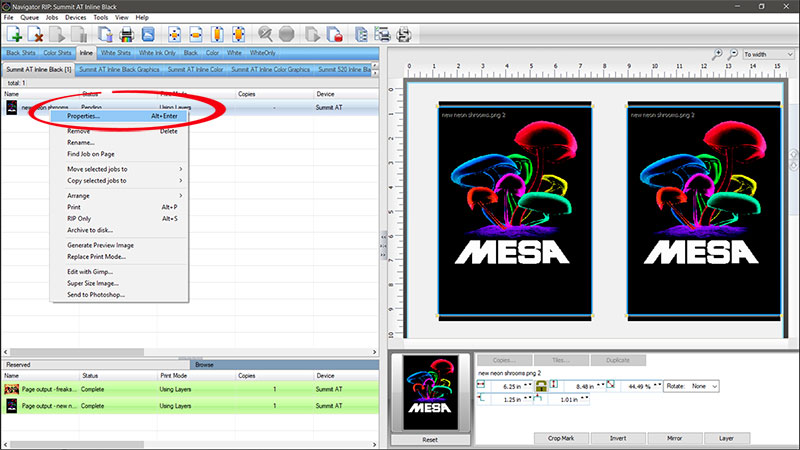
- Now click on the image thumbnail. This will put a binding box around the image. Then click and drag one of the corner yellow nodes. This will allow you to size and position the image.

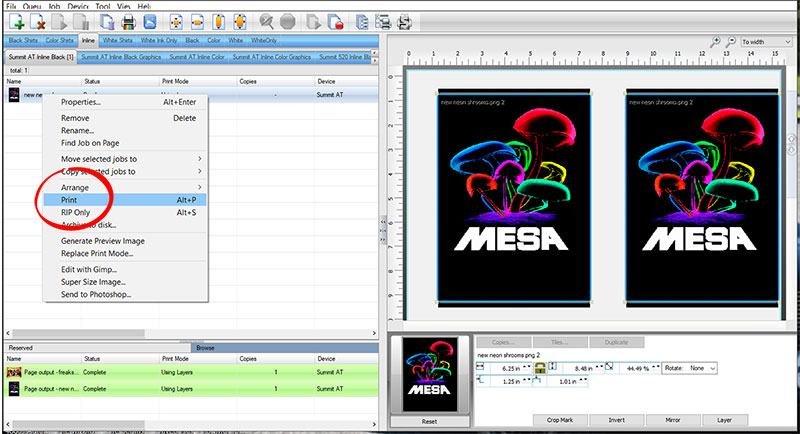
- Right click on the name of the job and then click on Properties.
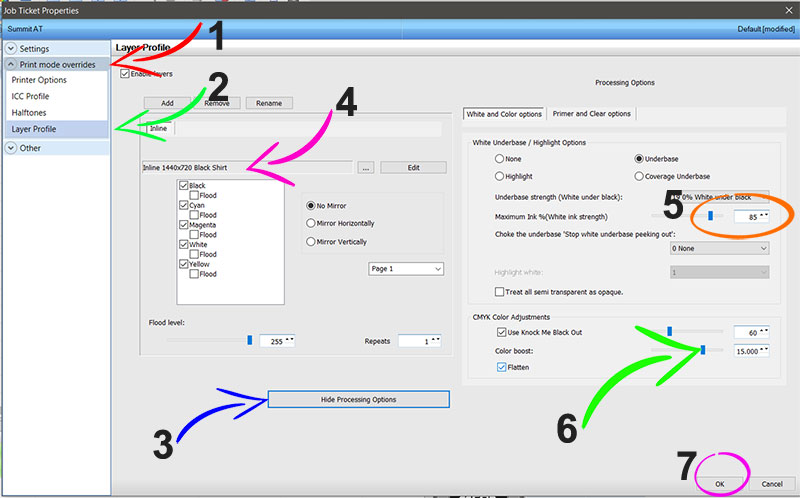
- Now click Print Mode Overrides. Then Layer Profile. Next, at the bottom, Show Processing Options. The Resolution should be set to 1440x720. Maximum White Ink % to 85. Colorboost 15. Click OK.
- Last, right click the file name and click Print.
Share this page:


